Light Bicycle WR50 Wheelset

I was looking forward to selling my previous Lun Hyper wheelset so I could invest in something new. While many overseas companies are fully aboard the carbon-spoke trend, I wanted a more traditional wheel with steel spokes paired with a modern, wider rim. Light Bicycle offered the customization I was looking for—without an overly exorbitant price tag.

The Custom Order

When ordering the wheels, Light Bicycle had a nice interface to show the order status as well as who was working on each stage. The feedback from the point of contact via email whenever a question or concern was raised was very quick.

The order was placed August 7, 2025

It was shipped September 30, 2025

It was delivered October 20, 2025

The Custom Wheels

HUB-F DT SWISS 240 EXP Black 12 / 100mm straight pull Center lock 24H 
HUB-R DT SWISS 240 EXP Black 12 / 142mm straight pull Center lock 24H EXP 36 Shimano Road 11S Alloy
Sapim CX Ray
Sapim Brass Black nipples
WR50 disc Standard Hook UD Paintless Disc 24H External Hole With Drain Holes No Access Holes 5 Years 
Centered (Traditional)

+4 additional spokes

+10% discount for the 14 year anniversary sale

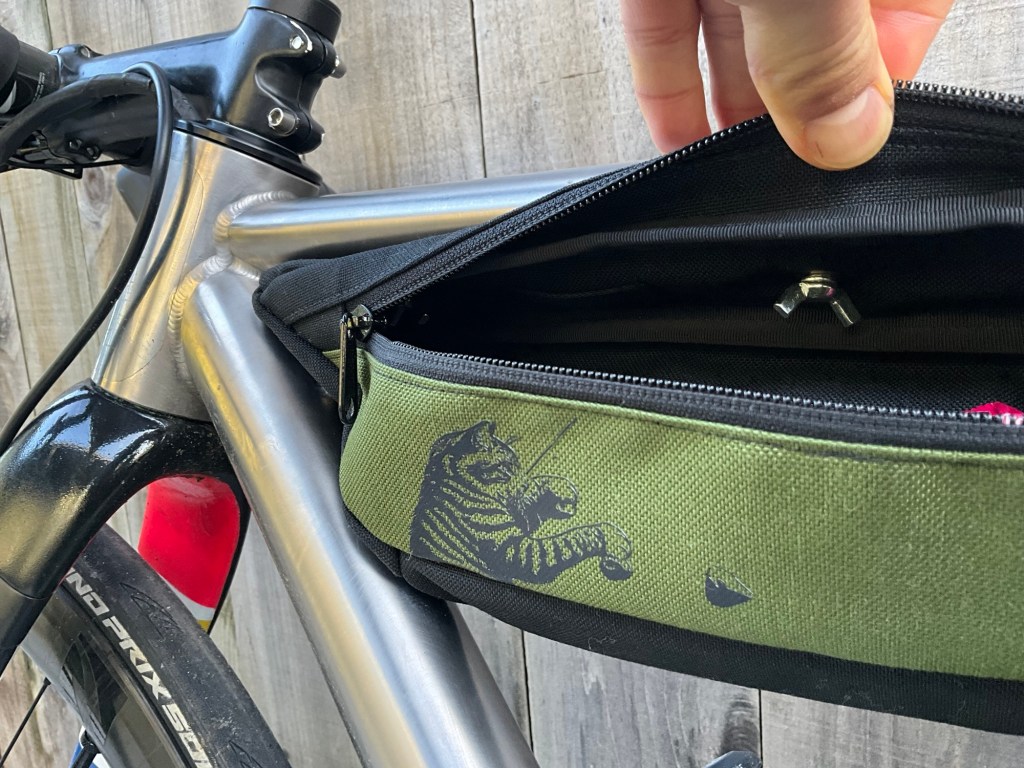
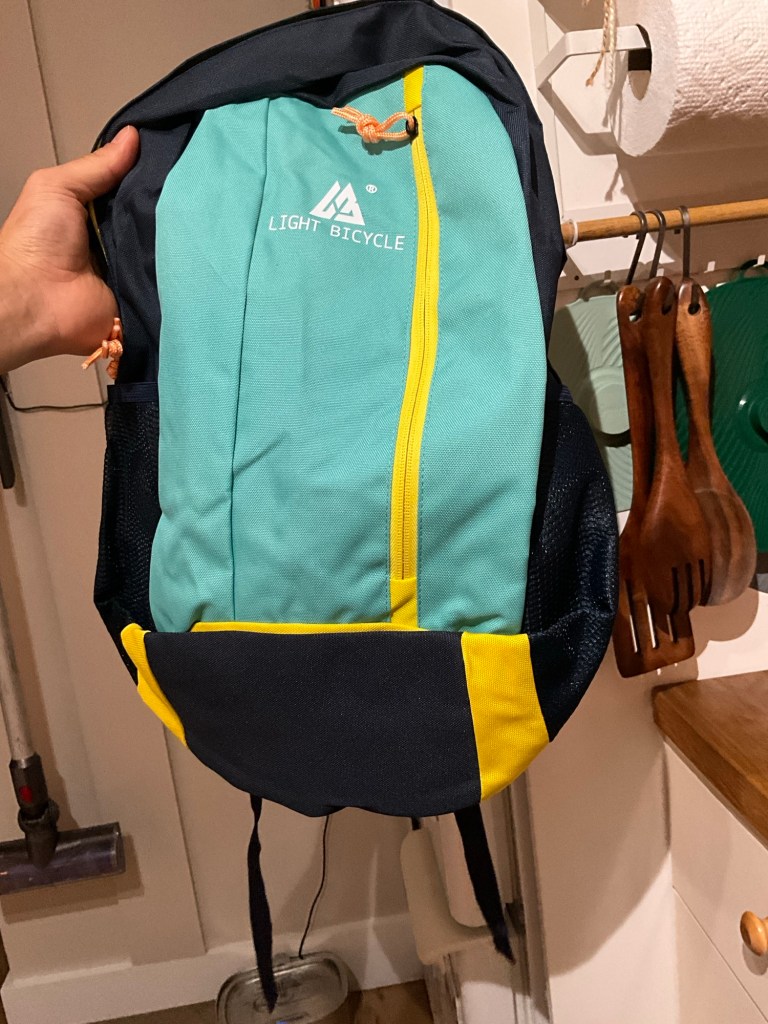
+free 14 year anniversary backpack gift.

$1,223.40

NOTE: Oversees shipping was done via MTS-Sea (Multimodal Transport Service) and UPS handled the delivery upon arrival at the port of Los Angeles. I did not have to pay any additional import tariffs.

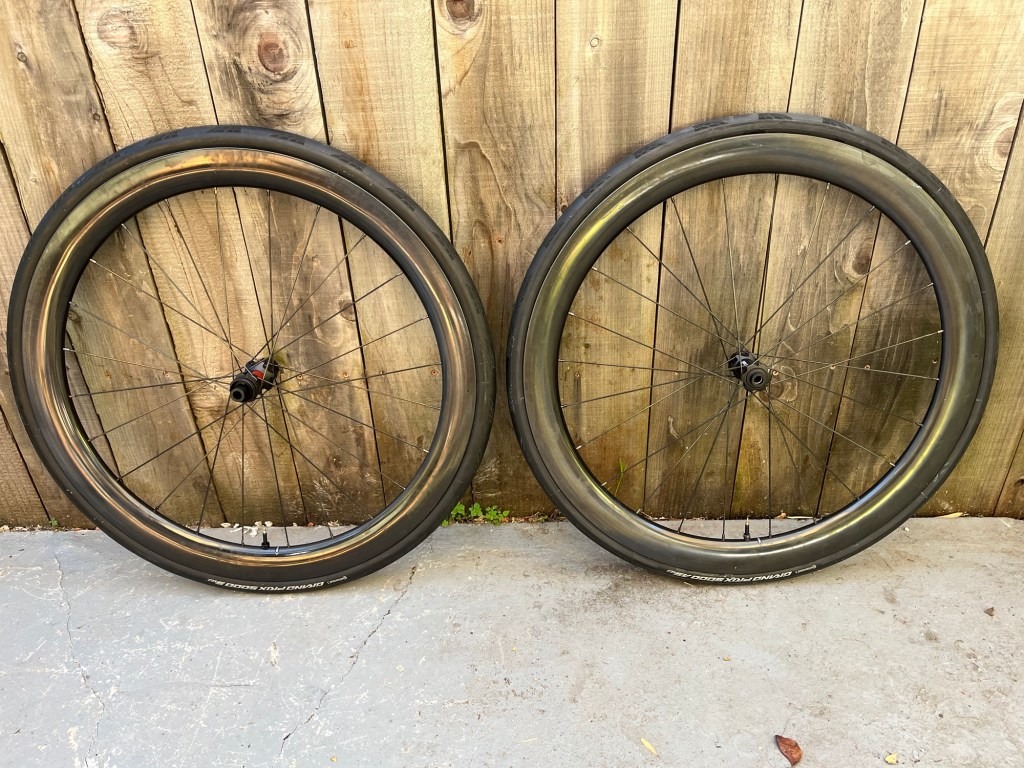
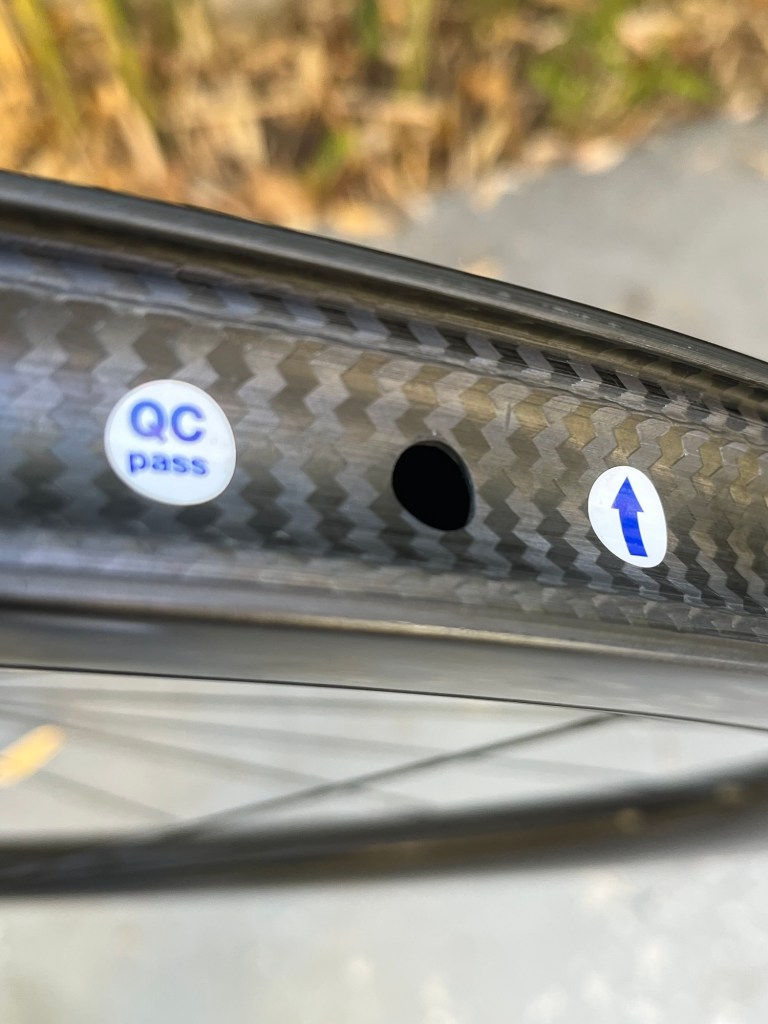
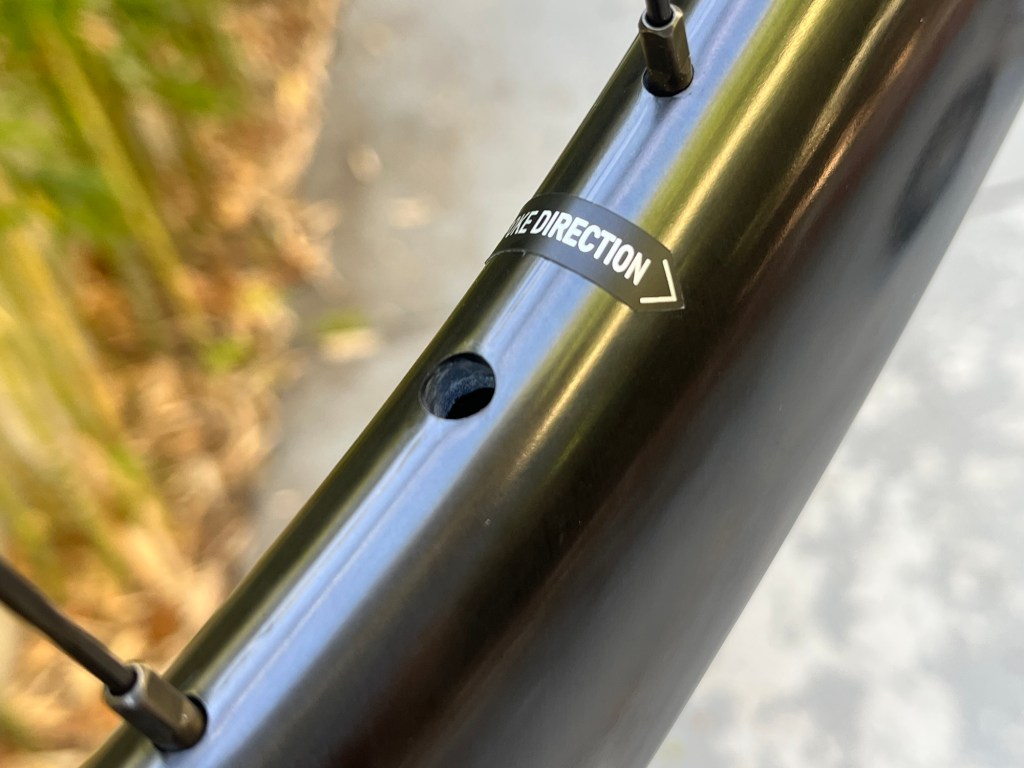
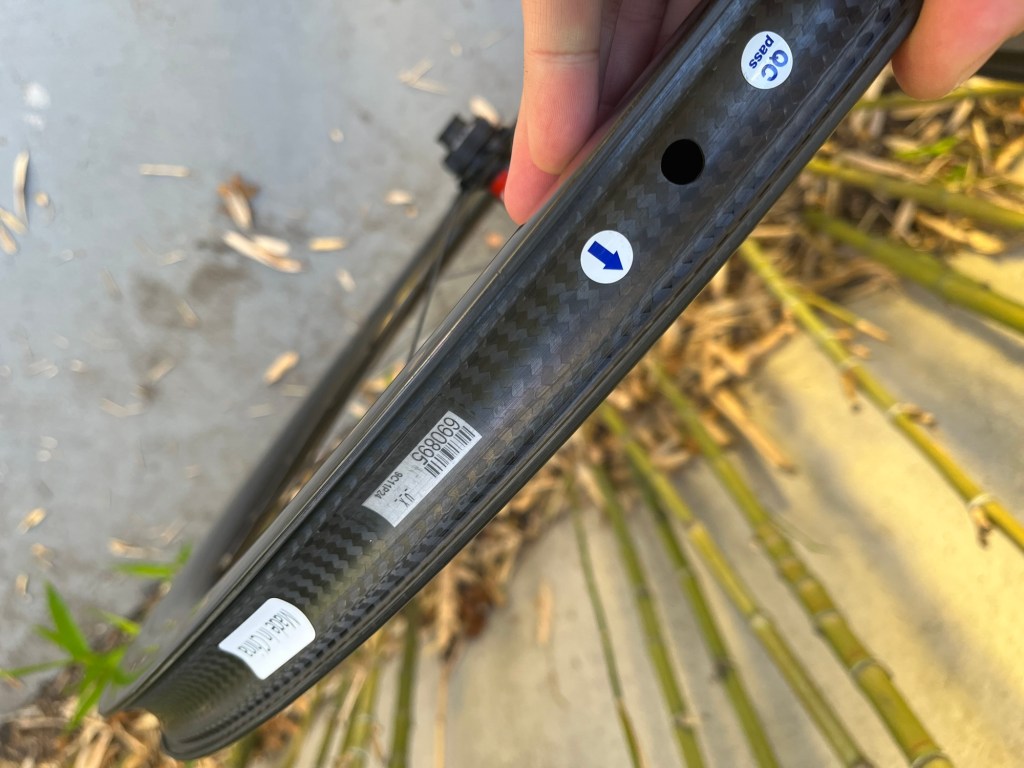
The rims look to be very solid. The fairing is solid and no imperfections could be found on the outside. There are some wheels in which you can feel how thin the side of the rim is. That is not the case for these. The holes that were drilled look to be very clean. These rims were not drilled for nipple access holes. Even though it will make nipple replacement a little more challenging, the rim will be just a little more stiff. The finish is also a unique carbon shimmer.
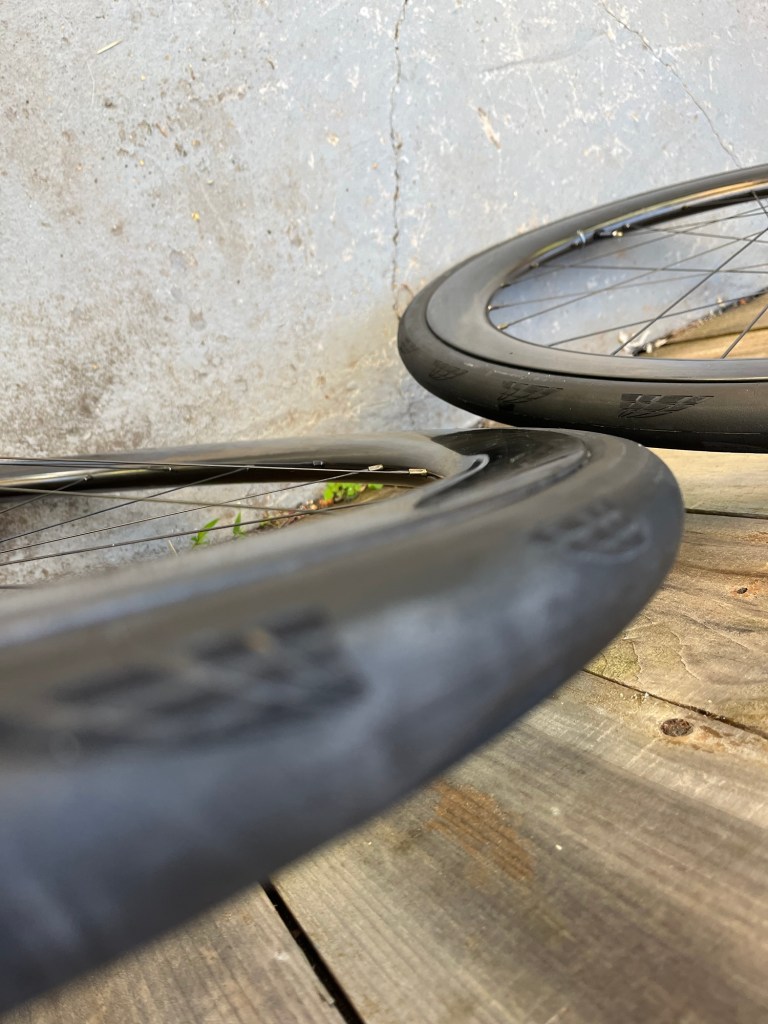
Tires

The tires are GP5000 S 30mm on the rear and GP5000 AS 28mm on the front. The front tire looks like it could have been a little narrower for a more aero rim profile.

Tires measured 32.67mm rear and 30.58mm front with a digital caliper.

Reservations

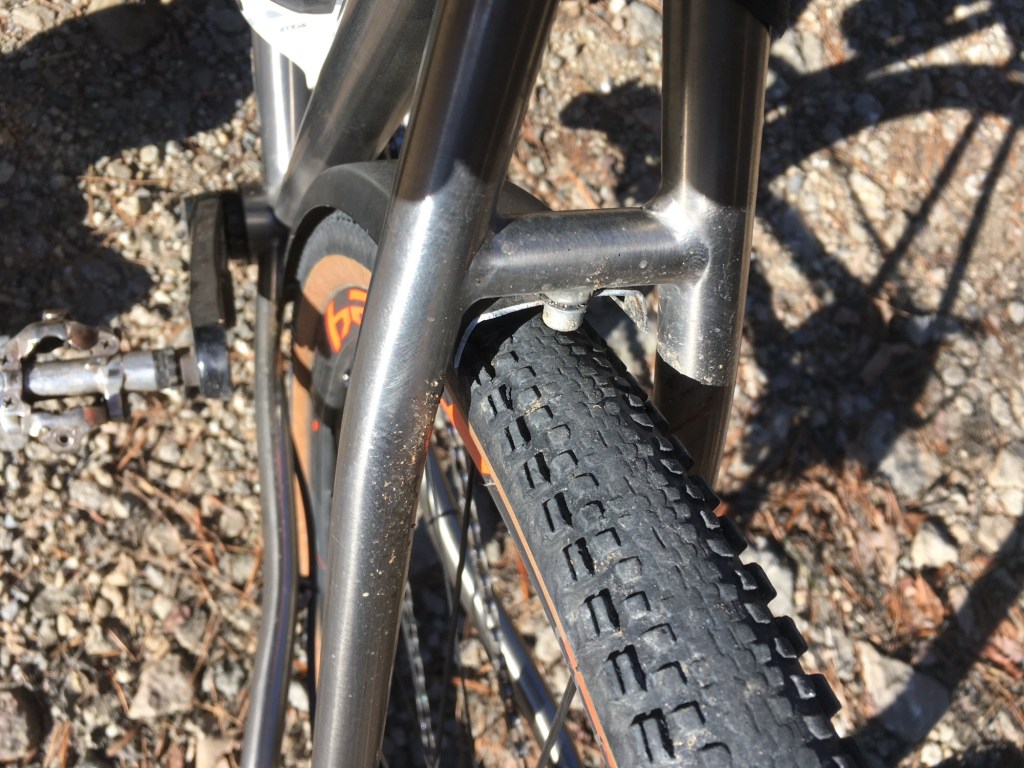
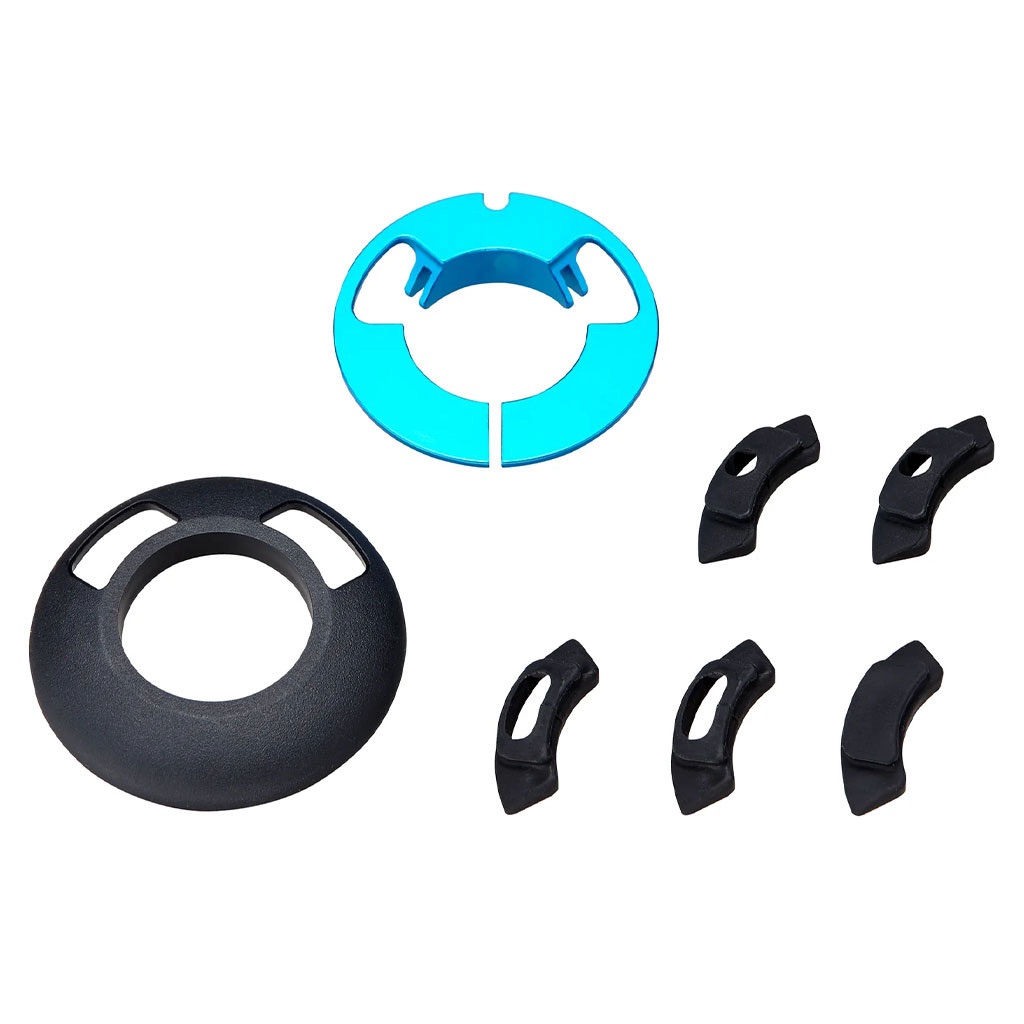
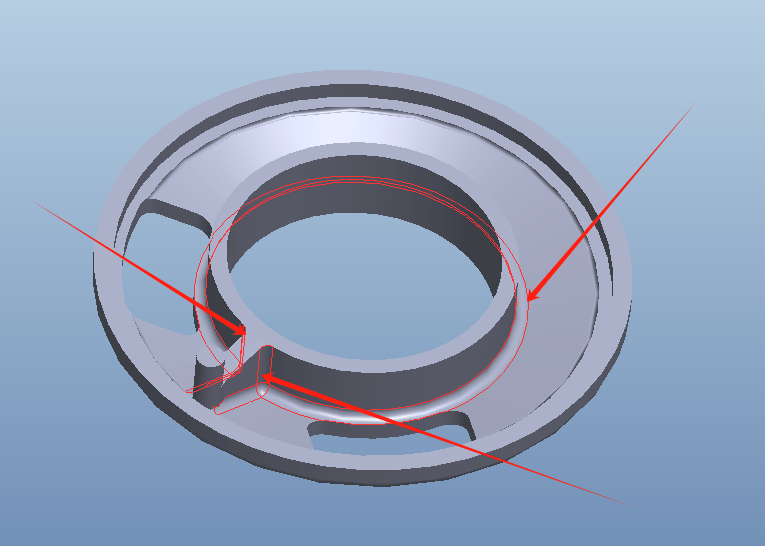
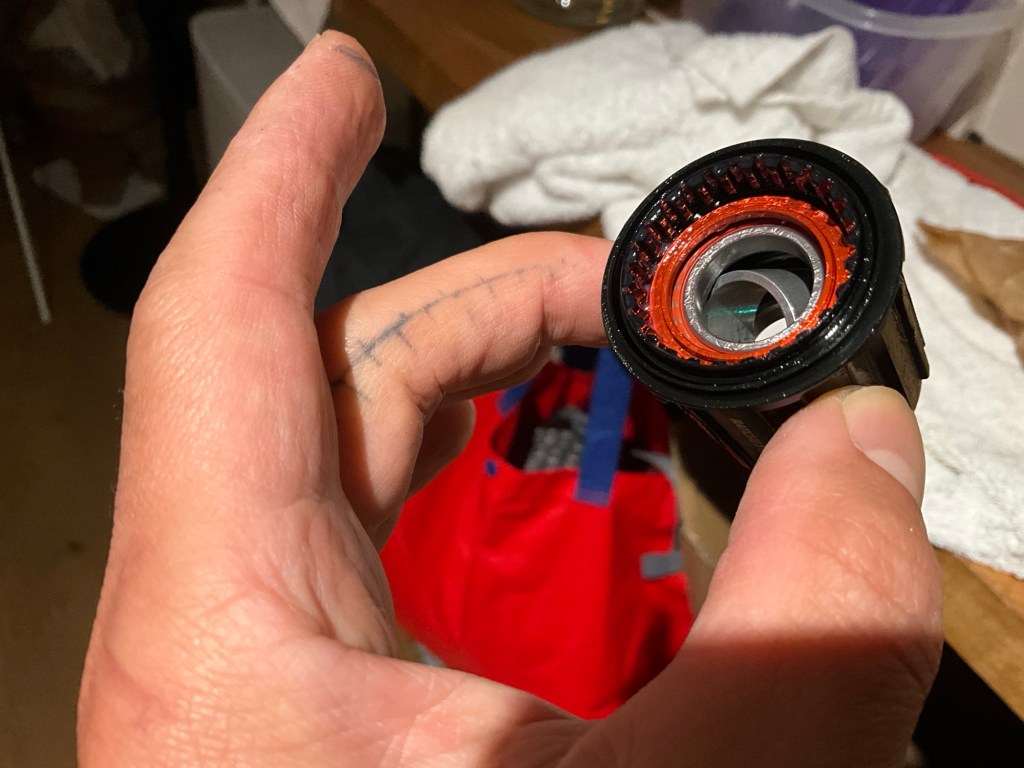
This wheelset is full custom, with the rim being made to order and then built up. After all this time and energy and money spent, the freehub came with a defect. When the wheel is installed and the axle threaded in, the freehub becomes seized and does not rotate in either direction. The wheel spins smooth otherwise. Turns out the shim/spacer in the freehub was undersized. It rattles when shaken as shown in the picture. This would explain the seizing issue. With the axle threaded, it would compress the freehub due to the gap made by the undersized spacer.

Light Bicycle was unable to provide any input or assistance. DT Swiss however was able to confirm the issue and agreed to send a new freehub body. Just need to wait a little bit longer.

Additionally, with the DT Swiss ratchet patent expired, other companies are already making improvements to the design. For instance, Elite has new hubs with a conical ratchet. DT swiss also has their DEG hubs but this technology has not trickled down into road hubsets yet.

I was also curious why the rear hub lacing was not done perpendicular to the hub for a more tangential and direct torque transfer. Perhaps the increased spoke length was an issue. Or the angled spoke might give the wheel more spring.

Lastly, the rear hub axle is anodized for added durability. However, the front hub axle is not. Light Bicycle was unable to provide any explanation on this.

Update

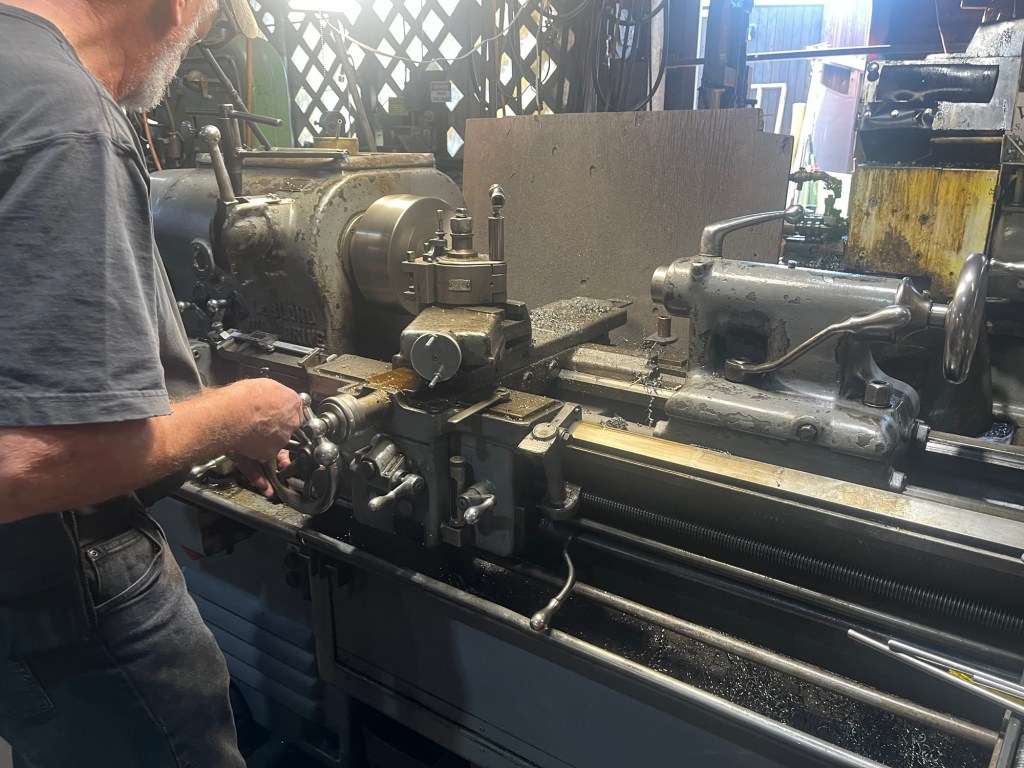
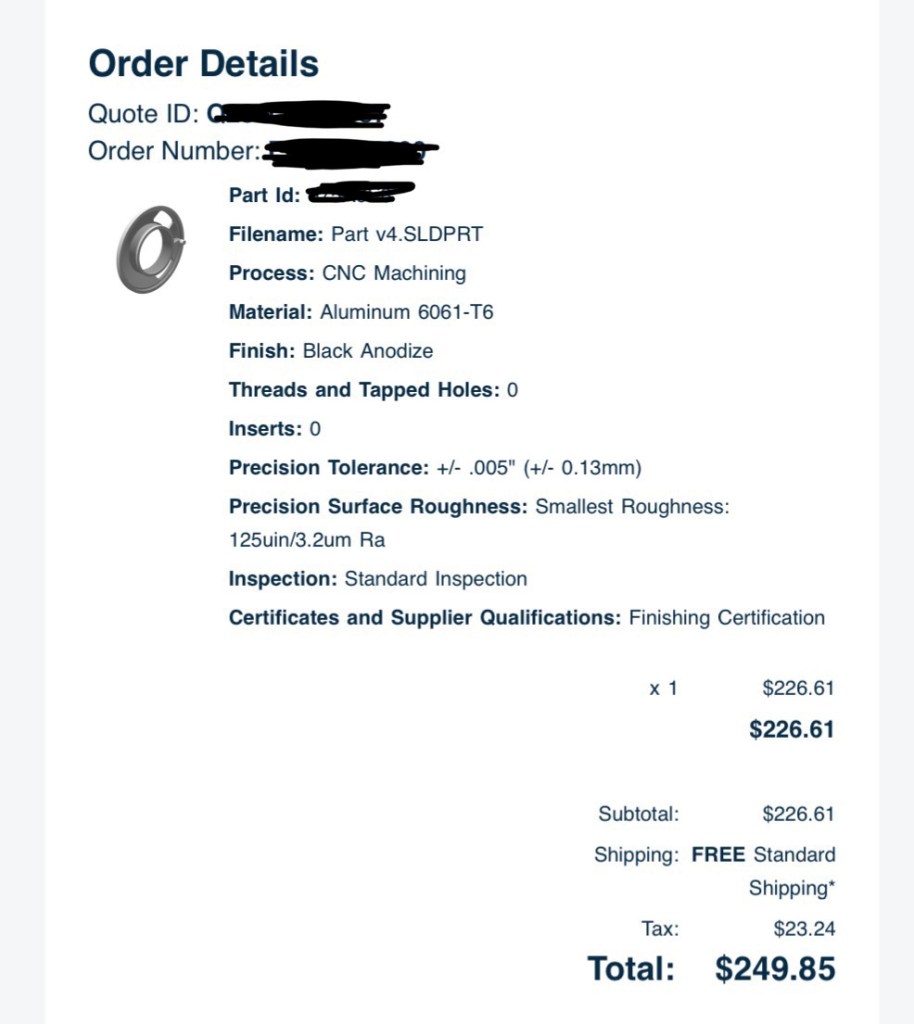
While waiting for a new freehub to arrive from DTSwiss, I reached out to a local machine shop to see if they could help in sorting out a new spacer of correct dimensions. After sizing everything up, the owner was able to get one made on the spot. The one installed was about 1/8″ too short.

It’s amazing that places like this still exist, albeit they’re under a lot of pressure of being phased out. Once installed, the wheel worked. Support your local industry.

Infrastructure Review: Oakland Grand Ave. & Harrison St.

Background

Oakland’s Grand Ave. Complete Streets program aims to improve traffic safety for bicyclists, pedestrians, and other traffic users. These goals are achieved by slowing down traffic in key corridors via the implementation of traffic calming measures. This particular intersection is also a part of Oakland’s Lakeside Family Streets. Although the new infrastructure does improve the chances of reduced speeds, there are still potential conflicts that could be fatal.

Bike Lane

The bike lanes run in all directions through the intersection. The east and westbound lanes are highlighted above. These improvements meet the Manual on Uniform Traffic Control Devices (MUTCD) and Federal Highway Administration’s (FHWA) mandatory guidelines and also incorporate optional design features such as green bike lanes, intersection markings with some areas functioning like bike-boxes.

The new design eliminated the previous marge lane that saw traffic conflicts between buses and the bus stop at the corner, personal vehicles, and cyclists.

Previous Conditions
New Construction

There is greater separation of traffic modes with buses and other vehicles now having to share the right lane, even during bus pick-up and drop-offs. The bike lane is given a protected right shoulder and pedestrians have access to a wide sidewalk. By creating this protected lane for cyclists, vehicles must now make a wider right turns. Although these improvements create separation, there are still design features that limit bicycle throughput and create new potential risks.

The improvements maintain bicycle lane continuity but the bicycle lane includes chicanes that introduce new risks. The bicycle lane has two chicane’s, one on each side of the intersection. This impedes bicycle throughput and is most restrictive when traveling eastbound on Grand Ave. due to the downhill gradient and higher bicycle speeds. Greater braking is needed to navigate the chicanes and avoid potential pedestrian and traffic conflicts. These features aim to increase safety via reduction of speeds instead of maintaining smooth uninterrupted bicycle travel lanes through the intersection and this is due to the bus stop at the intersection.

Risky bulb-outs. At night or when visibility is low, the bulb-out at the corner protrudes into a cyclists path. As mentioned above, with a cyclist traveling at a greater speed due to the downhill gradient of Grand Ave., they are put at a potential risk and required to navigate the chicane without hitting the bulb-out. There is a non-zero probability of a cyclist not seeing the bulb out in time and crashing, and having their momentum carry them into the traffic lane or intersection. If a car is making a right turn or traveling through the intersection at this time, the accident could be fatal.

The right turn conflict is worsened. A second point with potential conflict is the right turn. When traffic is stopped, cyclists will not have clear visibility of stopped cars, nor will they be able to see cars turning right because the protected green bike path will be treated like a bike box, and the cyclist will be stopped further ahead of traffic. One instance where a vehicle and bike collsion could prove fatal is if a light turns green and a cyclists begins to pedal from a stand still while a car traveling down Grand Ave. is entering the intersection with speed, the vehicle will have a decreased chance of seeing the cyclist due to the chicane because the bicyclist will be further ahead and further to the right. The cyclist will be vulnerable and unable to see the car approaching from behind and turning right. If a car is navigating the right turn and notices the bulb out, there will be a moment when their attention will be focused on not hitting the bulb-out and taken not on a cyclist traveling in the bike lane.

Stop Locations of Cyclists and Vehicles

The radius of the curve for turning vehicles is also hazardous for vehicles. As mentioned above, the bulb-out may distract the driver turning right. The nature of the bulb out is such that cars, especially longer vehicles, have difficulty turning around two apexes. Even though the construction was recently completed, there are already visible tire marks shown on the bulb-outs.

In conclusion, the traffic measures are effective at separating vehicle traffic from bicycle and pedestrians but create other problems. Vehicle throughput is hindered due to the shared bus stop at the intersection on Grand Ave. east bound. Bicycle throughput is also hindered due to the chicanes at the intersection. The bulb out also poses a hazard to cyclists because it protrudes into the cyclists’ path continuity. The cyclists also must be more acutely aware of cars turning right due to staggered stop positions. The design features do not make for smooth traffic flow through the intersection for vehicles turning right and cyclists traveling straight through the intersection. An intersection with more obstacles does not make an intersection more safe.

It would be more ideal to have the bike lane be protected, continuous, and straight through the intersection while having vehicles reduce their speed when making right turns.

Half Fender. Fender Power

Winters in Korea are harsh. Snow and slush, ice salts, and sub-zero temperatures that constantly leave extremities on the verge of going numb. With all the muck and debris, fenders save the day. They help keep the splatter at bay.

While on a weekend country-road gravel ride outside of Seoul, the rear fender experienced a ductile fatigue failure, splitting cleanly at the bolt mount on the underside of the seat stay bridge. I tried to salvage the broken section since it had the mounting bar and bracket attached. But over the course of the ride it became too cumbersome and was ditched in a garbage can. The half fender was born.

The half fender is easier to mount than a full fender since it only requires two 5mm bolts, one at the chain stay and one at the seat stay bridge. It helps keep the frame cleaner around the bottom bracket and seat tube. Without a fender, this area can easily get dirty with it being so close to the rear wheel. This section is also more difficult to clean with all the small voids around the front derailleur (FD) and if there is a FD clamp.

The half fender doesn’t do a lot in terms of protecting the rider from poopoo splatter and debris, but it does keep the bike cleaner and maintenance down.

Unlike the SKS fender, the gold fender doesn’t have the same cross section to help contain flying debris. The gold fender is just a flat piece of aluminum. This was a repurposed aluminum strip that was originally a doorway seam binder. It is thin and easy to cut and bend, also, gold.

For future or alternative designs, I would consider extending the bottom section of the fender below the seat stay bridge to offer more protection around the bottom bracket.

Disc Brake Maintenance

Disc brakes are great when riding in adverse conditions and offer stronger and more responsive braking control than rim brakes. However, the brake system is more difficult to install, adjust, and harder to maintain. One key aspect of having well working disc brakes is having pistons that articulate smoothly.

Doing a deep cleaning is a sure way to keep the pistons and caliper clean. To this end, a short burst from an air compressor after a ride doesn’t require any disassembly and removes a lot of brake dust, preventing dust buildup and prolonging the time needed before a deep clean.

Ti All Road v2

This second version of the titanium all road build has proven to be a fun, fast ride. The geometry works in such a way that I can ride comfortably and efficiently, in a more tucked aero position if I choose. One area I notice a difference in ride quality compared with the first titanium all road frame is on a climb. When riding just outside of threshold I am able to find a springy rhythm that allows me to keep the pedals turning. The bike also feels very nimble and secure when riding out of the saddle. The front end feels light when sweeping back and forth, responsive, and stiff enough to translate my energy into the forward direction. All of this positive feedback is also noticed when riding on flats but to a lesser degree.

The frame saw some changes compared with the first titanium all road frame, highlighted on the diagram. Some changes that are not highlighted include straight seat stays, a front derailleur mount, and a head tube to accommodate internal routing.

The geometry was adjusted based on my experience with the first all road frame. The top tube was extended and the seat and head tube angles were tightened up. These angle adjustments seemed to pair very well with the enve CX fork that was used.

The frame saw some stiffness upgrades in the form of a larger diameter down tube and a thicker bottom bracket shell.

Lastly, with the bottle cage lowered for easier frame bag access and more tire clearance, this frame leaves little to be desired.

The fork was hand painted, one stripe at a time, in a traditional Korean color scheme called saekdong (색동). This vibrant color pattern is historically associated with cheerful youth who would wear these colors on their traditional hanboks (한복) on special occasions such as lunar new year and thanksgiving (추석). Through the Japanese occupation it also became associated with human rights. Today it is associated with festive Korean events and can be seen in many different versions and forms.

Another upgrade for this build was the new Di2 12 speed Ultegra Group. This version allows for semi-wireless shifting, where the levers do not need to be connected directly to the derailleurs. However, in the hopes of extending the battery life, the shifters were wired directly to the derailleurs.

I had intended on having the wire port on the underside of the chain stay and was amiss when it was on the top. However, its current placement does make for a more natural wire routing curvature.

The rear drop out design has a separate plate that is secured over the thru axle nut. This keeps the thru axle nut attached to the frame making it easier when removing the rear wheel.

Similar to the first version of the all road frame, this frame also has mounts welded to the seat stays.

The front derailleur (FD) mount was added to this version of the frame. The first all road frame had a clamp for the front derailleur and I noticed that it got in the way of the bottle cage and rear wheel/fender. The FD mount cleans up the down tube for a cleaner look. If this bike was ever built up with a single chainring, the mount could be used to install a chain guide.

Similar to the first all road frame, this uses a threaded T47 bottom bracket. If a third iteration of this bike were to be made, I would consider a BB with bearings pressed directly into the shell for simplicity and alignment. This frame It also includes a mount in the chain stay bridge for a fender.

The final aluminum top cap fits the frame as designed, with all rear cables running through the head tube. One design feature this top cap severely lacks is waterproofing. There are multiple entry points where water can easily enter the head tube.

Another consideration that I would like to have on a potential third frame iteration would be a welded seat post clamp.

The biggest upgrade that was made to this frame was the addition of 5mm mounts on the underside of the top tube and one mount on the upper side of the down tube. A frame bag was commissioned from a good friend and local custom seamstress known as Idle Feline. This was her first bike bag, and frame bag she has made. It fits the frame triangle perfectly and includes the holes for the mounts. Wing nuts were used to secure the frame bag and to allow for easier installation and deinstallation.

For future consideration, I would like to have the mounts recessed, or filed down flush with the profile of the top tube to hide the mounts when they are not being used, and to allow the frame bag to sit more flush with the top tube.

Space Efficient Bike Storage

Having lived in many small apartments, creating safe and secure bike storage for multiple bikes is a challenge. The end of this post will have details about an adaptable hanging and sliding bike storage design.

A lot of mainstream bike storage solutions can be less than ideal when space is limited, such as the wall mounted bike racks.

These static wall-mounted bike racks have their time and place. They’re great if you have one or two bikes, and the floor and wall area to spare. When installed at the proper height, they can be easy to take the bike on and off. Furthermore, this style of rack can be a nice alternative bike stand when doing any type of bike maintenance. It can also be pleasing having the bike on full display.

There are a wide range of static, wall mounted bike racks available. One thing they have in common is that once installed, that is where the bike will stay and cannot easily be moved or placed anywhere else.

Typical commercial bike rack storage

When working and living in more confined spaces, a hanging bike rack can help save wall space as well as having a smaller footprint area. It takes some strength to be able to hoist the bike off the hook, but properly leveraging the bike can make this easier and safer.

Although this type of storage allows for some degree of rearranging by sliding the hooks, the rack itself is still static. When using this type of storage rack, it would be important to consider what type of bike(s) would be hung since the rack should have enough of a setback from the wall to ensure the bike can fit.

The sliding bike rack

Compared with other static wall mounted racks discussed earlier, this hanging bike rack can store upwards of 5 bikes in the same amount of space.

Sliding Rack Design

This rack uses an aluminum extrusion rail, similar to those used with sliding french doors. The cross section allows for a hanger to be installed and the weight properly distributed to the rails. Rails can be found online or in local hardware stores for a very reasonable price.

Note. It is important to install the rail into a solid wood ceiling member, utilizing all mounting holes for support strength.

The nut and bolt head lay in the rail guide

Although not the most elegant solution, a nut and bolt can suffice when hanging heavy duty hooks. The bolt head and nut keep the bolt aligned in the rails, preventing it from turning or coming loose. A heavy duty hook can be placed around the bolt and support the bike. The bolts can also slide along the rail to allow for the bikes to be placed at any suitable point.

Variable Ceiling Conditions

If the ceiling heights are variable or if the ceiling can not be screwed into, or if you want something completely modular, closet tension racks can offer a more adaptable solution.

The rods are compressed between the floor and ceiling and the horizontal rod heights are also adjustable. These designs are made to be adjustable in order to accommodate a wide range of closet and interior space dimensions. The rack shown below was used in an apartment where the walls were concrete. The tension rack was sturdy and very adjustable.

When it comes to bike storage, there’s no one-size-fits-all solution. The limitations of the space and personal preferences will help find the best bike storage solution.

Integrated Headset Cap for Internal Routing

When choosing to build a bike with internal routing, the cockpit can become complex and congested with multiple hoses and lines all going into the down tube. A lot of factory brand bikes that utilize internal routing come with their own proprietary options that are not designed to be interchangeable. Even aftermarket products like Enve have their own unique system. The integrated cockpit designs that are currently available require that the headset and stem, and sometimes handlebars, be used together as a set in order to work. This is not ideal if one wishes to choose a stem and handlebar separately, as has always been done for bike fitting purposes.

For my titanium frame, I wanted to have a stem with a zero degree rise and this design was not available, with integrated stems ranging from 12 to 6 degrees. This led me to opt for a headset design that would allow for cables to be run through the top cap such that a standard road stem and handlebars could be used. This would also simplify the installation slightly since cables would not need to be run through the handlebars and/or stem. It would also make it easier to swap stems and/or handlebars in the future. There were not many options available that allowed for this piecemeal installation method. The Cervelo mountain bike headset assembly seemed to be a viable option, but it did not come without its issues.

BC538 Cervelo Headset Top Cap Assembly for $23
The headset installation manual

A common feature of all integrated headset/handlebar products is the interlocking parts of the headset. The top cap and bearing race are linked together via the protruding tab on the bottom of the top cap (shown in the installation manual). This allows for the top cap, bearing race, and cables to move uniformly, preventing the cables from being twisted when steering.

The issue that arose with the titanium frame was that the top cap was not compatible due to the dimensions of the headtube.

The diagram shows the dimensions of the headtube. There is 8.7mm above the taper where the bearing will sit.

The diagram from FSA No. 55R shows the bearing height as 8mm, leaving a gap of 0.7mm between the top of the bearing and the top cap for my frame.

The cervelo bearing race, when inserted into the upper bearing, does not come up flush with the top of the headtube. The upper cap also does not have any demension that extends below the bottom surface meaning that the cap, when installed, cannot touch the bearing race and therefore the interlocking tab cannot engage. The diameter of the top cap was also larger than the diameter of the headtube, and the inner diameter, for the steerer, was a loose fit.

The top cap was redesigned in solid works such that the top cap would extend below, and the tab even further, allowing it to fit with the dimensions of the headtube and crown race.

Top cap rise is extended 1.9mm below the bottom face, and the locking tab is 4.25mm longer.
The prototype installed

The Final Design

After 3D printing and prototyping the top cap design, a final drawing was made and sent to be CNC’d out of Aluminum. This will require that the brake hose will need to be uninstalled and re-routed through the opening. All-in-all, a simple installation for a permanent solution to running cables internally.

The price to pay for an integrated cable solution.

Columbus Futura Cross

Bought for 400,000 won in 2020 from a custom builder who uses columbus forks. Prices have only increased since then.

This fork was chosen for my first titanium all-road build to be able to withstand greater impacts and accommodate wide tires. It is not a fully integrated fork; the brake cable is run externally. The benefit of this is easier maintenance and packability/transportability when disassembling.

Made in China

The metal sleeve where the bearing crown race is inserted was a good design choice. It protects the carbon steerer, potentially improves the concentricity, and makes installing and removing the crown race easier.

The Columbus fork’s “RTP (read to paint)” finish came sanded and, well, ready to paint.

Freshly painted

Issues

The design to change the fork rake is unique. However, the tiny screws that hold the plates in place were poorly designed. They were too small, far too delicate, and could not easily withstand the torque needed to tighten them. All of the screws provided became stripped.

Bottom Line

This is not the lightest fork available, but it is very sturdy as it has been taken on some very rocky and uneven terrain. More caution is necessary when installing the adjustable fork rake plates.

My Ti, All-Road Custom Frame

This bike was designed and made in 2020 to serve as a road bike with the option of running wider tires. This was my first attempt at designing a bike that would look great and ride even better. The manufacturing company, Waltly, provides design options such as various tubing dimensions and frame add-ons, but it stops there. They’re a simply a high quality manufacturer and don’t offer the structural or handling analysis that some boutique custom bike builders do. Therefore, when designing this frame I went for stiffness and robustness. I maxed out the tubing size for the down tube, seat and chain stays. For the top tube I opted for their oval tube. And for the head tube, I went with the design I observed on other bikes at the time; a tapered 1.5″ headtube.

Geometry

When working with Waltly, they offer custom made frames but do not offer the same level of design consulting that a custom frame builder would in terms of geometry, handling, and rider experience. When you send Waltly dimensions, they fabricate it and their execution and price point make are what make them stand out.

For geometry, my starting point was the geometry of the frame I was currently riding, a Storck Visioner. At this point, I could have sent Waltly the geometry numbers from the Storck but decided to make some tweaks based on ways I thought the Storck could be adjusted to better fit myself. For instance, the reach on Storck’s tend to be longer and the stack height higher for what I needed. With these changes in mind, and instead of blindly adjusting numbers, I started looking at geometry of other frames that aligned with these changes.

I ended up settling on the geometry from the Low MKII Disc All Road. These frames are aggressive, and have reach and stack dimensions that are more aligned with my size and preferences. Next, I had to choose the fork that I would use with the frame; Low does not sell forks separately so an aftermarket fork was the best option. I went with a Columbus fork that was robust enough to handle the occasional gravel ride. This meant I had to make some small adjustments to the geometry to accommodate the fork which had a longer axle to crown length. I shortened the head tube and increased the head tube angle such that the stack and reach would be unchanged.

Other features this design included:

  1. Lowered seat stays
  2. Curved seat and chain stays
  3. Frame inserts for both Di2 and mechanical groups.
  4. Maxed out tire clearance
  5. 31.6 seatpost
  6. T47 bottom bracket
  7. Seat stay and bridge mounts for fenders/racks.

Note. The drop outs, cable inserts, rear caliper location, water bottle mounts, and seat and chain stay bridges were all selected by Waltly.

Complete Bike Ride Review

The first immediate issue I noticed had to do with the steering. The Columbus fork has an insert that allows for the rake to be adjusted to 47 or 52mm. When riding with the 52mm rake setting, the steering felt slow/delayed. I would never end up using this setting.

The 47mm rake setting improved the steering such that the bike felt stable when corning and riding without any weight on the handlebars (no hands!).

Adjustable rake

The geometry of the bike appears to be a aggressive with a negative sloping top tube but this is due to the wrong headset being installed. The Chris King inset headset has negligible rise whereas a lower cup would have provided the stack height needed to prevent the negative slope.

Other features that I encountered with this build that would be changed on an updated frame:

  1. Water bottle mounts were too high, making it difficult to fit a frame bag.
  2. Steering is not as smooth as it could be with the Columbus fork.
  3. The top tube is too short.

Final Thoughts

This turned out to be a great bike that has the potential of a lot of different build options. It is a fun, fast bike to ride despite the design flaws. It is light weight and resilient in all weather conditions.

Flat bar + gravel tires + rack
Flat Bar Commuter
Gravel Bike

NJS Panasonic Seat Bolt

A panasonic track bike was posted for sale at a price that was right. Little information was written and I was only expecting what was pictured and nothing more. After inspecting it and taking a closer look, it turned out to be an NJS frame with beautiful lug work. After bringing it home it was rebuilt.

The original for-sale listing photo

The bike was deconstructed, including removal of all the stickers, and all components were replaced to something more appropriate.

Seatpost Binder Bolt

The original seatpost bolt was missing and the previous owner was using a nut and bolt. I removed it and opted for a nut and bolt that fits the recessed area in the frame. The nut needed to be ground down to fit the notched grooves in the frame.

The Build

There were no issues removing any of the old components. Everything was replaced except the bottom bracket and headset.

Aero Integrated Stem for HB017

The HB017 is a carbon fiber aero frame and fork. The lines and design of the frame and seatpost are clean; there are no awkward bends or curves. It is what one might think a straight-forward modern aero frame would be. As with other modern aero framesets, the assembly is fully integrated, meaning the cables are all hidden inside the frame and this can easily lead to assembly issues, particularly when building a non-brand bike.

With internally routed aero bikes, the cables from the levers run inside the frame as do the cables from the derailleurs. The one-piece handlebar and stem component that is compatible with the frame was purchased separately. However, it did not fit my geometry nor was it at an aesthetically pleasing angle. The angle of the stem was 6 degrees, and I was going for a zero degree stem. The aftermarket for building integrated bikes is limited. Bike companies like specialized, Willier, Cannondale, and any other commercial brands have their own designs that are not cross-compatible. There are after-market options but these are often hundreds of dollars, far more than I was willing to spend.

With the limited availability of compatible parts, I decided that the BMC integrated stem would work, as it is available in different sizes and for a reasonable price. The details of this build are described below.

The Frameset

The frameset was purchased from Aliexpress. The geometry was acceptable. The frameset included all parts, including seatpost, stem, and handlebars.

The included stem and handlebars.

Aero Cockpit

I intended to build an aero bike with the fully integrated handlebars and ordered the handlebars that were compatible with the frame.

The stem angle of these bars was higher than I wanted. Something visually unpleasing and less aero. Due to the nature of the internal routing through the headset, using a different stem is simplified if the headset hardware, including the spacers could still be reused. Fortunately, I found out the BMC stem has a similar cross section at the steerer as the existing headset. The BMC stem also has a better stem angle, 12.5 degrees. This matches the slope of the top tube which is aesthetically pleasing.

There are additional benefits of having a separate stem and handlebar: handlebar mounting accessories for round cross-sections, adjustable handlebar pitch, and the option of changing the stem. I used a generic carbon road handlebar and routed the cables from the outside of the bar, under the stem, and through the spacers, into the frame.

Side view of the cable routing.

Disassembled view

The Complete Bike