Space Efficient Bike Storage

Having lived in many small apartments, creating safe and secure bike storage for multiple bikes is a challenge. The end of this post will have details about an adaptable hanging and sliding bike storage design.

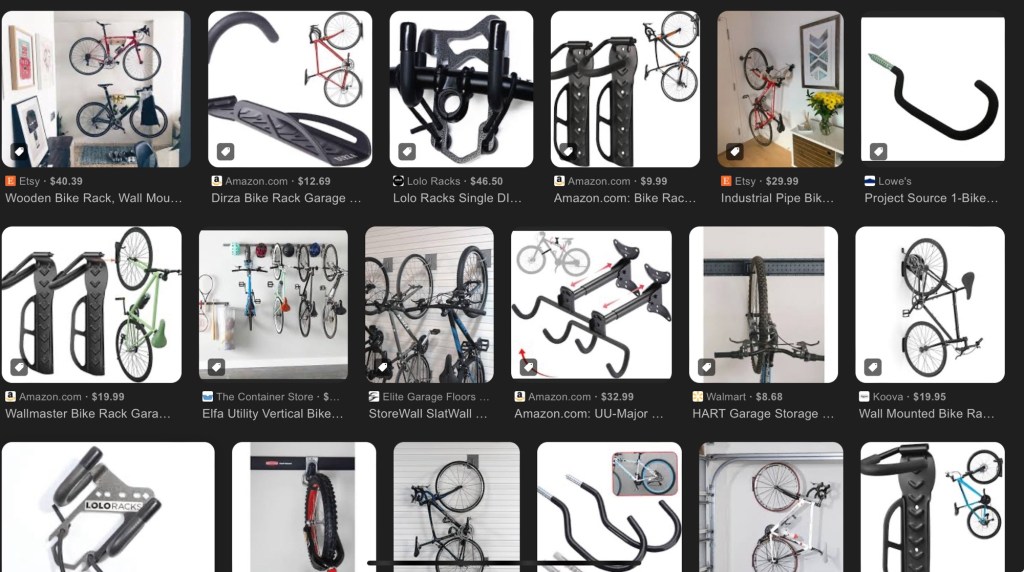
A lot of mainstream bike storage solutions can be less than ideal when space is limited, such as the wall mounted bike racks.

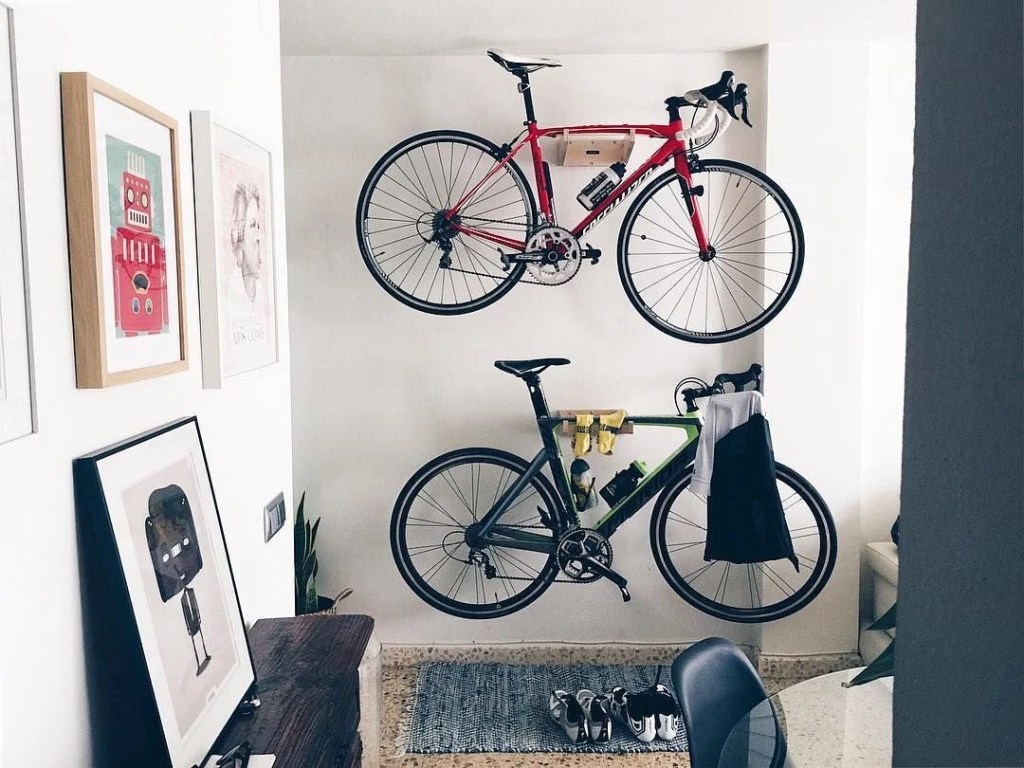
These static wall-mounted bike racks have their time and place. They’re great if you have one or two bikes, and the floor and wall area to spare. When installed at the proper height, they can be easy to take the bike on and off. Furthermore, this style of rack can be a nice alternative bike stand when doing any type of bike maintenance. It can also be pleasing having the bike on full display.

There are a wide range of static, wall mounted bike racks available. One thing they have in common is that once installed, that is where the bike will stay and cannot easily be moved or placed anywhere else.

Typical commercial bike rack storage

When working and living in more confined spaces, a hanging bike rack can help save wall space as well as having a smaller footprint area. It takes some strength to be able to hoist the bike off the hook, but properly leveraging the bike can make this easier and safer.

Although this type of storage allows for some degree of rearranging by sliding the hooks, the rack itself is still static. When using this type of storage rack, it would be important to consider what type of bike(s) would be hung since the rack should have enough of a setback from the wall to ensure the bike can fit.

The sliding bike rack

Compared with other static wall mounted racks discussed earlier, this hanging bike rack can store upwards of 5 bikes in the same amount of space.

Sliding Rack Design

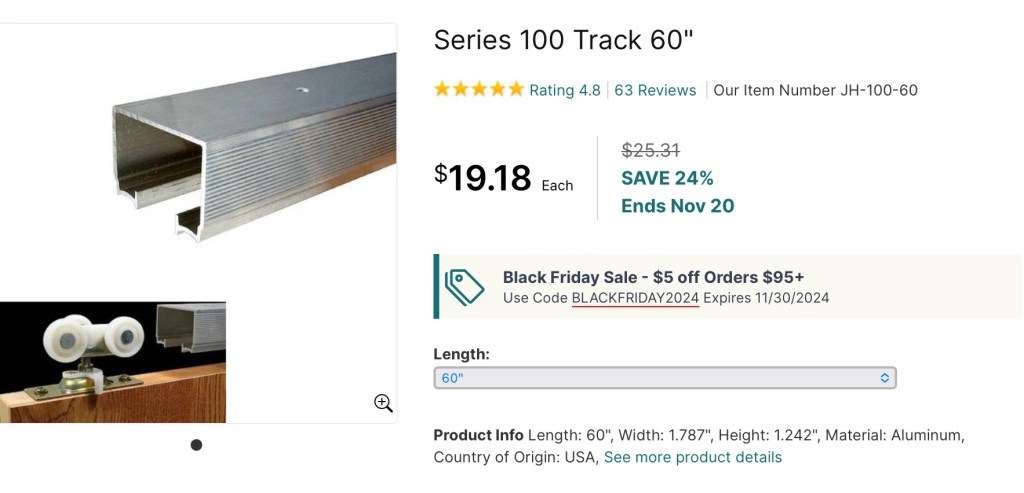
This rack uses an aluminum extrusion rail, similar to those used with sliding french doors. The cross section allows for a hanger to be installed and the weight properly distributed to the rails. Rails can be found online or in local hardware stores for a very reasonable price.

Note. It is important to install the rail into a solid wood ceiling member, utilizing all mounting holes for support strength.

The nut and bolt head lay in the rail guide

Although not the most elegant solution, a nut and bolt can suffice when hanging heavy duty hooks. The bolt head and nut keep the bolt aligned in the rails, preventing it from turning or coming loose. A heavy duty hook can be placed around the bolt and support the bike. The bolts can also slide along the rail to allow for the bikes to be placed at any suitable point.

Variable Ceiling Conditions

If the ceiling heights are variable or if the ceiling can not be screwed into, or if you want something completely modular, closet tension racks can offer a more adaptable solution.

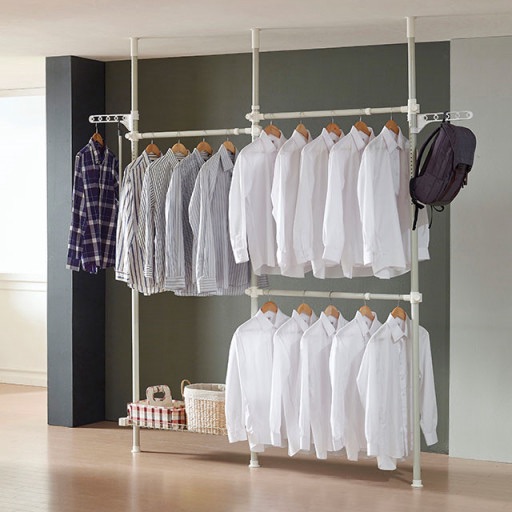
The rods are compressed between the floor and ceiling and the horizontal rod heights are also adjustable. These designs are made to be adjustable in order to accommodate a wide range of closet and interior space dimensions. The rack shown below was used in an apartment where the walls were concrete. The tension rack was sturdy and very adjustable.

When it comes to bike storage, there’s no one-size-fits-all solution. The limitations of the space and personal preferences will help find the best bike storage solution.

Integrated Headset Cap for Internal Routing

When choosing to build a bike with internal routing, the cockpit can become complex and congested with multiple hoses and lines all going into the down tube. A lot of factory brand bikes that utilize internal routing come with their own proprietary options that are not designed to be interchangeable. Even aftermarket products like Enve have their own unique system. The integrated cockpit designs that are currently available require that the headset and stem, and sometimes handlebars, be used together as a set in order to work. This is not ideal if one wishes to choose a stem and handlebar separately, as has always been done for bike fitting purposes.

For my titanium frame, I wanted to have a stem with a zero degree rise and this design was not available, with integrated stems ranging from 12 to 6 degrees. This led me to opt for a headset design that would allow for cables to be run through the top cap such that a standard road stem and handlebars could be used. This would also simplify the installation slightly since cables would not need to be run through the handlebars and/or stem. It would also make it easier to swap stems and/or handlebars in the future. There were not many options available that allowed for this piecemeal installation method. The Cervelo mountain bike headset assembly seemed to be a viable option, but it did not come without its issues.

BC538 Cervelo Headset Top Cap Assembly for $23
The headset installation manual

A common feature of all integrated headset/handlebar products is the interlocking parts of the headset. The top cap and bearing race are linked together via the protruding tab on the bottom of the top cap (shown in the installation manual). This allows for the top cap, bearing race, and cables to move uniformly, preventing the cables from being twisted when steering.

The issue that arose with the titanium frame was that the top cap was not compatible due to the dimensions of the headtube.

The diagram shows the dimensions of the headtube. There is 8.7mm above the taper where the bearing will sit.

The diagram from FSA No. 55R shows the bearing height as 8mm, leaving a gap of 0.7mm between the top of the bearing and the top cap for my frame.

The cervelo bearing race, when inserted into the upper bearing, does not come up flush with the top of the headtube. The upper cap also does not have any demension that extends below the bottom surface meaning that the cap, when installed, cannot touch the bearing race and therefore the interlocking tab cannot engage. The diameter of the top cap was also larger than the diameter of the headtube, and the inner diameter, for the steerer, was a loose fit.

The top cap was redesigned in solid works such that the top cap would extend below, and the tab even further, allowing it to fit with the dimensions of the headtube and crown race.

Top cap rise is extended 1.9mm below the bottom face, and the locking tab is 4.25mm longer.
The prototype installed

The Final Design

After 3D printing and prototyping the top cap design, a final drawing was made and sent to be CNC’d out of Aluminum. This will require that the brake hose will need to be uninstalled and re-routed through the opening. All-in-all, a simple installation for a permanent solution to running cables internally.

The price to pay for an integrated cable solution.

Columbus Futura Cross

Bought for 400,000 won in 2020 from a custom builder who uses columbus forks. Prices have only increased since then.

This fork was chosen for my first titanium all-road build to be able to withstand greater impacts and accommodate wide tires. It is not a fully integrated fork; the brake cable is run externally. The benefit of this is easier maintenance and packability/transportability when disassembling.

Made in China

The metal sleeve where the bearing crown race is inserted was a good design choice. It protects the carbon steerer, potentially improves the concentricity, and makes installing and removing the crown race easier.

The Columbus fork’s “RTP (read to paint)” finish came sanded and, well, ready to paint.

Freshly painted

Issues

The design to change the fork rake is unique. However, the tiny screws that hold the plates in place were poorly designed. They were too small, far too delicate, and could not easily withstand the torque needed to tighten them. All of the screws provided became stripped.

Bottom Line

This is not the lightest fork available, but it is very sturdy as it has been taken on some very rocky and uneven terrain. More caution is necessary when installing the adjustable fork rake plates.

My Ti, All-Road Custom Frame

This bike was designed and made in 2020 to serve as a road bike with the option of running wider tires. This was my first attempt at designing a bike that would look great and ride even better. The manufacturing company, Waltly, provides design options such as various tubing dimensions and frame add-ons, but it stops there. They’re a simply a high quality manufacturer and don’t offer the structural or handling analysis that some boutique custom bike builders do. Therefore, when designing this frame I went for stiffness and robustness. I maxed out the tubing size for the down tube, seat and chain stays. For the top tube I opted for their oval tube. And for the head tube, I went with the design I observed on other bikes at the time; a tapered 1.5″ headtube.

Geometry

When working with Waltly, they offer custom made frames but do not offer the same level of design consulting that a custom frame builder would in terms of geometry, handling, and rider experience. When you send Waltly dimensions, they fabricate it and their execution and price point make are what make them stand out.

For geometry, my starting point was the geometry of the frame I was currently riding, a Storck Visioner. At this point, I could have sent Waltly the geometry numbers from the Storck but decided to make some tweaks based on ways I thought the Storck could be adjusted to better fit myself. For instance, the reach on Storck’s tend to be longer and the stack height higher for what I needed. With these changes in mind, and instead of blindly adjusting numbers, I started looking at geometry of other frames that aligned with these changes.

I ended up settling on the geometry from the Low MKII Disc All Road. These frames are aggressive, and have reach and stack dimensions that are more aligned with my size and preferences. Next, I had to choose the fork that I would use with the frame; Low does not sell forks separately so an aftermarket fork was the best option. I went with a Columbus fork that was robust enough to handle the occasional gravel ride. This meant I had to make some small adjustments to the geometry to accommodate the fork which had a longer axle to crown length. I shortened the head tube and increased the head tube angle such that the stack and reach would be unchanged.

Other features this design included:

  1. Lowered seat stays
  2. Curved seat and chain stays
  3. Frame inserts for both Di2 and mechanical groups.
  4. Maxed out tire clearance
  5. 31.6 seatpost
  6. T47 bottom bracket
  7. Seat stay and bridge mounts for fenders/racks.

Note. The drop outs, cable inserts, rear caliper location, water bottle mounts, and seat and chain stay bridges were all selected by Waltly.

Complete Bike Ride Review

The first immediate issue I noticed had to do with the steering. The Columbus fork has an insert that allows for the rake to be adjusted to 47 or 52mm. When riding with the 52mm rake setting, the steering felt slow/delayed. I would never end up using this setting.

The 47mm rake setting improved the steering such that the bike felt stable when corning and riding without any weight on the handlebars (no hands!).

Adjustable rake

The geometry of the bike appears to be a aggressive with a negative sloping top tube but this is due to the wrong headset being installed. The Chris King inset headset has negligible rise whereas a lower cup would have provided the stack height needed to prevent the negative slope.

Other features that I encountered with this build that would be changed on an updated frame:

  1. Water bottle mounts were too high, making it difficult to fit a frame bag.
  2. Steering is not as smooth as it could be with the Columbus fork.
  3. The top tube is too short.

Final Thoughts

This turned out to be a great bike that has the potential of a lot of different build options. It is a fun, fast bike to ride despite the design flaws. It is light weight and resilient in all weather conditions.

Flat bar + gravel tires + rack
Flat Bar Commuter
Gravel Bike